Thursday, December 24, 2009

Merry Christmas!

I just wanted to wish everyone a Merry Christmas.
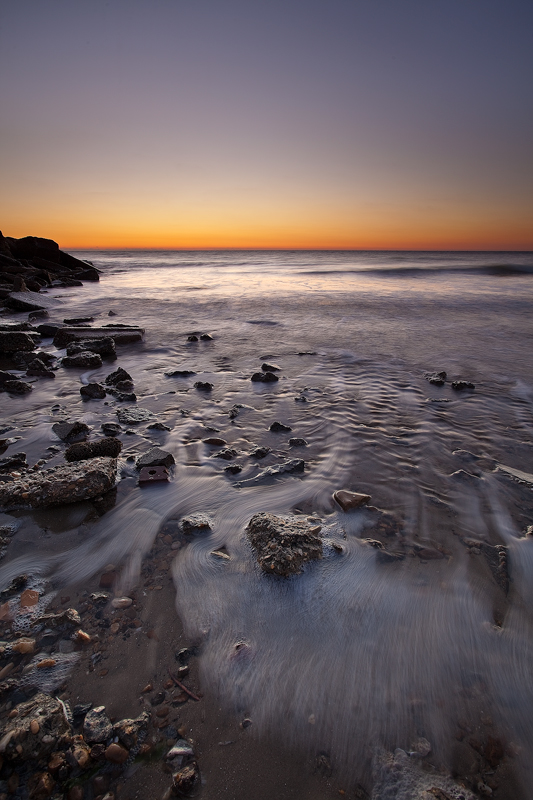
A group of us (Jerry Kelley, Steven Hoagland, Sherry Boylan, Genevieve Neal, Jim Hansen, and I ) photographed the sunrise this morning at Grandview. It was especially challenging with cloudless sky. Even with a 3 stop graduated neutral density filter, I had to do some exposure blending to even out the contrast.


Friday, December 18, 2009

Cold

....but it was worth waking up. I was rewarded with these magnificent colors.
Both were mad with a 5D Mark II, 17-40mm f/4 L, and I also borrowed a friend's Sing Ray 3 Stop Reverse Grad ND filter.


Sunday, December 6, 2009

Holly Dazzle


This was taken during Holly Dazzel at City Center

Saturday, November 14, 2009

Beauty Lighting

I did a blog article on beauty lighting a few months ago but I love the results of this lighting setup so much, I wanted to share again. Last time I used one light from above and a reflector at the bottom. This time I used one light from above inside of a beauty dish and one light from the bottom inside of a medium softbox and this is the result.

My lovely wife Michele


Tuesday, November 10, 2009

Photographing the Holidays

The Holidays should be a time of joy and celebration but it often turns stressful for whomever is in charge of taking the pictures. This year, eliminate the stress and take better pictures by following a few basic tips.

Be Prepared
The night before the holiday gathering, make sure you have your gear ready. This means fully charged batteries, and an extra set. Plenty of empty memory cards. Tripod, light stands, reflectors. You may also want to have your camera and flash settings correct prior to the family gathering as well. This will ensure your pictures turn out great without having to fumble with the settings while your family is there.

Use the Right Light
When photographing the Christmas tree, avoid using flash. Flash will overpower the lights on the Christmas tree and create a harsh shadow. Also, try out of focus shots when photographing the tree.



If it's all possible, avoid using the on-camera pop-up flash when photography people. Direct flash is very unflattering and should be avoided. If you do not have the option for remote flashes, using something like a piece paper towel over the flash will help soften and diffuse the light.

Also consider using as much available light as possible. This means opening the windows and letting natural light in. If you're using lights from lamps or other artificial light sources, remember to change the White Balance setting on your camera to avoid strong color shifts.

Getting Great Holiday Family Portraits


Hire me!
But if you want to try yourself, these tips may help.

Have the family wear festive, holiday colors. You want the photo to say the Holidays so greens, reds, and whites are appropriate. Not everyone has to wear the same color, but patterns and busy prints should be avoided.
If you decide to take the photo outdoors, earth toned colors are a safe bet.


Make sure all your camera and lighting settings are correct before the family poses. This will ensure that the task will be stress free and that you keep your subjects looking happy. This is especially true for kids and babies. You'll have a time span of about 2 minutes. Make sure you spend that time getting great smiles and expressions and not fidgeting with your camera settings.

When photographing a group of people, have everyone close their eyes and count to three. On three, have them open their eyes and then take the shot. This will reduce the chances of someone blinking.

Getting Great Holiday Family Candids
Make a list of shots that you don't want to miss. A list will help you remember important shots that you may otherwise forget because of the hectic nature of the day.

When photographing kids and pets, get on their level. Perspective can make a break a photo.

Anticipation is the key. Be ready when kids open their gifts to make sure you capture their expressions.
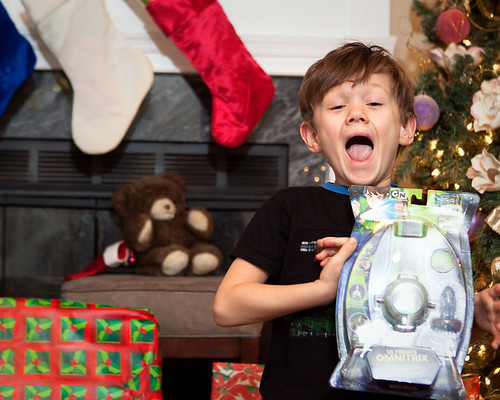

Take a shot for every gift opened. This will help keep memories alive.

When photographing in the snow, remember that all digital cameras will have a tendency to underexpose. Change the settings on your camera to increase the exposure 1-2 times the norm.

Last but not least.....have fun!


Monday, November 2, 2009

A Balloon Festival with no balloons

I’ve planned a trip to Winchester, VA a few months ago. I booked a hotel for a couple of days and made plans to visit Skyline Drive and the annual Winchester Balloon Festival. We arrived at our hotel on Thursday and visited Skyline Drive after getting checked in. We were hoping to photograph the beautiful fall foliage along Skyline Drive. We were disappointed because there was about 10 feet of visibility due to the thick clouds that were lingering around the mountains so needless to say the photographic opportunities were nil but we had high hopes for Friday.

We woke up at 4AM to be able to get to the mountains in time to catch the sunrise. We were disappointed once again with the thick cloud cover until we got a break in the clouds. It only lasted about 20 minutes, just in time to get this image:


The clouds rolled back in quickly but I wasn’t ready to quit shooting yet. I couldn’t really shoot anything wide because the lack of visibility so I decided to pull out the 400mm and snag these shots:


We later stopped for breakfast at a restaurant off of Skyline Drive. The food was good but the architecture was better. Here is a shot of the restaurant’s ceiling:


We decided to make our way to downtown Winchester. It was a gloomy day but at least we were under the clouds and not literally in them. Here are a few shots I made while in town:


Yummy Thia food.


Saturday morning was the big morning. THE HOT AIR BALLOON LAUNCH! We arrived at the Balloon festival at 7AM ready to capture the big hot air balloons. We left at 8:30AM after they announced the balloon launch was cancelled due to the weather. BUMMER! :-(
I did sang a few non-balloon photos at the festival:


All the aniticipation and planning went down the tubes. It was time to head back home. We drove down Skyline Drive and I managed to get one more decent photo:


There's always next year.

Sunday, October 18, 2009

Accent Lighting

Accent lighting can add a nice three dimensional touch to any shot but it can be challenging to properly execute. The goal is to create a soft light that can be contained to a certain area. Soft light usually spreads everywhere thus making two light sources appear flat. So how do you create soft light that's also controllable? Grids!


For this shot of Heather, I used a Beauty Dish with a grid on it (camera left) as the key light, and a stripbox with a grid (camera right) for the accent light.

Sunday, October 11, 2009

Seascape Techniques

I posted some seascape images in my last Blog post . For this blog entry, I'll list some techniques and equipment I used to capture them.

Exposure
Getting the correct exposure is vital with any type of photography and seascapes are no expcetion. I like photographing the sea when the sun is near the horizon. This is the time when the drama happens. The colors will be vivid and bold and the colors will be reflected off of the water.

Keep in mind that the expsoure will be tricky because the sky will be bright and the foreground will be dark. It will be difficult to show detail in both the sky and foreground because the range of light will often be greater than what the camera can handle. You can overcome this by either using a graduated neutral density filter or braketting the exposure and bledning the exposures in post processing. (I'll post the step on how I do this later in the week) To bracket the exposure, place your camera on manual exposure. I like using a small aperture (f/11-f/22) to increase the depth of field. Use the lowest true ISO your camera can go to. Adjust the shutter speed to get a decent base exposure and then just vary your shutter speed up and down + - 3 stops.

Composition
Rule of thirds! Enough said! Actually I'll expand. Try not to split the horizon and try even harder not to place the sun smack dab in the middle. This will create a bullseye effect and the viewer's eye will focus in the center and stay there.

Keep the horizon level!

Look for an interesting foreground obect(s). (Rocks, drift wood, shells, jetty, or bring your own starfish.)

Try getting low. Avoid having the camera aimed straight and at eye level. Remember that you're creating art and not just recording events.

Focus
Use one focus point and place that focus point on the lower thirds, usually on the interesting foreground object. Once you have the focus locked, set it to manual so it won't refocus as you bracket your shots.

Color
In most cases Auto White Balance will do just fine but try experimenting with different Kelvin values. In most cases Auto White Balance will try to correct color, so if there is a very warm sunset, AWB will overcompensate and add more blue to try to "correct" the color. If accuracy is vital to you, using a calibrated gray card is a good way to make sure the white balance is accurate. Keep in mind that shooting in RAW is extremely beneficial not only for exposure forgiveness but also for nondestructive color adjustments.

Equipment Considerations

  • Sturdy tripod and ballhead - ensures sharpness
  • Cable release - ensures sharpness
  • Graduated ND filter - Balances contrast of bright sky and dark foreground
  • ND filter - slows shutter speed to capture motion in the water
  • Lenses - Various focal lenghths for various looks. Typically wide angle works best. Lens with large aperture and IS are not necessary.
  • Circular Polarizer - boosts saturation, darkens skies without darking white clouds, reduces glare off of water, see underwater objects normally unseen without polarization.


Wednesday, October 7, 2009

Sand, Sea, & Sky

Next Tuesday's class (October 13th) will be on the topic of shooting seascapes and fall foilage. Here are some seascapes I've shot in the past. We'll talk technique in the class.


Thursday, October 1, 2009

Old Fashion Bubbles

Here's a shot of Andrew playing with bubbles. I converted the image to sepia.
Remember, when shooting children or pets, get on their level.

Tuesday, September 29, 2009

Check out Firg's site

I'm a guest blogger today at Firg's site: CLICK HERE

Saturday, September 19, 2009

Light+Color+Fog=Dramatic


It took my about 30 minutes to finally to get this shot but I think it was well worth it.
I started out with one light. A White Lightning 1600 gelled blur, bare bulb. I had to adjust the power and distance to get it just right. I then added a directional font light. An Alien Bee 800 inside of a gridded softbox, camera right. I got the exposure right on both of them but I thought the image still lacked drama. I then added the home made gobo in front of the backlight which helped a bit but the real drama started when I turned on the fog mahcine. The combination of gelled blue backlight and fog really worked well with the gobo. The light spread into rays, castint through the fog and parts of the bike making for an image I was proud of.

Soccer Dad

I was the only parent at my son's soccer who had a lens that weighed more than a small child:

But it was worth lugging the BEAST around capturing the action because The Yellow Hammers won their first soccer game.

He's only 6! Andrew (Beckham)

Monday, August 31, 2009

Location Lighting: Answers


Last week I solicited questions regarding Location Lighting. Here are some of the questions I received and my responses.


Allan said...
"Will,
I am a photographer and have run across this term 1/4 CTO gell or full CTO gell. I have a gel pack that I ordered from the US but the actual gels do not have labels as to 1/4 or full.

First - does this refer to the density of the gel colour on the gel film?
Second - how can you tell which is which?

I have just discovered your website and I think the images are really great."


Thanks Allan. CTO stands for Color Temperature Orange. There are varying degrees of CTO gels ranging from 1/8, 1/4, 1/2, 3/4, and Full CTO. CTO gels are used to change the color temperature of the flash to warm. The stronger the CTO, the warmer the light output will be. Without the labels on the CTO, it is difficult to distinguish what strength CTO gel it is, however it is safe to say that the more orange the CTO is, the stronger it will be to change the color temperature.


Sharon Kearns said...
"Hi Will, I will be doing some shoots on the beach at sunset within the next month & would like to know what kind of equipment/flash accessories i will need? I use a canon 40d & still don't have an external flash! What is the best quality one?
Thanks,
Sharon Kearns"


Great question Sharon. The first thing is to get the flash off of the camera. If you buy an external flash also known as a speedlight and place it on the hotshoe of your camera, you'll just have an extra powerful popup flash. The key to good lighting is to seperate the light from the camera axis. Depending on your budget, Canon has several options to choose from with their flagship speedlight being the 580EXII. It's their most powerful flash and it can act as a master, controlling other flashes. If you decide to get just one speedlite, you may want to consider getting some kind of triggering system that will activate the flash when it's off of your camera. There are several to choose from ranging from around $50-$150. If you're going to be using the flash outdoors, I would recommend using radio triggers. Radio triggers do not rely on "line of sight" and their signal is not effected by harsh sunlight. One other thing to consider is getting something that will soften or diffuse the light coming from the flash. The cheapest and easiest modifier to use is probably an umbrella. It will soften the light and spread it all around making a light that's a few inches big to 40 inches big.


Developing Designs said...
Will, Thanks for giving us the opportunity to ask questions. Off camera flash is something I have been struggling with and would love to try and understand better. Is there any sort of formula to know sync speed or what power settings to use on the flash (1/2 power or full) in certain situations. I mainly do portraits, and interiors.
I am working with a Nikon D80 with 2 SB600s (off camera)
Thank you!


The Max Synch Speed of the D80 is 1/200 but that doesn't mean you have to use that shutter speed everytime. Nikon actually has a really good flash system called CLS. It uses TTL technology to determine flash output. TTL stands for Through The Lens. It sends a quick preflash and in miliseconds determines how much actual flash is needed to properly expose the subject. It works good in most cases but never great in all cases. I prefer using manual settings on the camera and the flash because once I get my exposure right, I know I can rely on consistent results for every shot. The real question is how do I determine the right exposure for a shot. I don't normally use a light meter. For outdoor shots or shots that have some ambient light, you'll have to worry about 2 exposures; ambient and flash. I start by determining what I want my aperture to be. I then choose my shutter speed and ISO. Shutter speed has virtually no effect on flash exposure however it does effect how much ambient light gets into your shot. Determine the balance you want to find between the subject and the background. I start with the flash off. I get my the exposure I want for the background by choosing the aperture, shutter speed, and ISO in manual mode. Once that has been determined and set, I introduce flash. Again, I don't use a light meter so I take a best guess, take a shot with flash, look at my lcd and make changes as needed.

When shooting in a studio, I just keep my shutter speed at 1/160. I only have to worry about one exposure and that's the flash exposure on the subject. Choose the desired aperture, keep your ISO set to the lowest possible, and the shutter speed at max synch or slightly lower. I take a shot and look at the image and adjust my flash power as needed.

Again, I don't use a light meter or try to figure out ratios. If I use more than one light sources, and often I do, I start with one light, get that right and then add more lights.


This question was emailed to me from Bob.

"Will: I have three speedlights (580EXII, 550EX, and 430EX). My light modifiers consist of a Gary Fong universal lightsphere and stofen diffusers. I am interested in what addtional equipment you suggest and how you use it."

Bob, the Gary Fong and Stofen dome diffusers were designed primary for on camera flash as a way to diffuse the light and/or bounce the light off of a wall or ceiling. Since you have the 580EXII which can act as a Master and can control other flashes wirelessly, I would start using off camera flash. I would reccomend getting from light stands and some shoot through umbrellas. A shoot through umbrella can make a small speedlight into a huge light source. Remember that the larger the light, the softer the light.


This question was posted on the NAPP forum by Michael:

"Which lights do you prefer to use on location (outside), your Alien Bees or your Canon Speedlights and why?"

Michael, I prefer using my Speedlights while on location because I don't have to worry about carrying a heavy battery pack and since I do a lot of beach shoots, I don't have to worry about getting fried if water touches my gear.

This question was posted on the NAPP forums as well by sfsherrill:

"I have two questions regarding umbrellas on location. First: How large? Wind can often be an issue in outdoor shooting and a the larger the umbrella, the more it wants to become a sail. Second: If you use a shoot through umbrella, you can get closer to your subject (assuming a portrait) because you can place your flash, umbrella shaft, light stand, etc. away from your subject making it possible to get away with a smaller umbrella - BUT - and here's my question, what is the most obvious difference in the quality of light between a shoot through vs a bounce umbrella?"


You're right. Umbrellas can act as a sail and just a little gust of wind can knock your gear over. This is why I try to work with an assistant as much as possible to hold the light. If I don't have an assistant, I use sand bags and weights to anchor my light stands.

I prefer using a shoot through umbrella when photographing individuals because as you mentioned, I can place the umbrella really close to the subject. I often place a shoot through umbrella right outside the frame of view to get the softest light. I prefer using a bounce or reflective umbrella when shooting groups because I can have the umbrella further away and it spreads the light broader.


This question was asked by joejoebarnes:

joejoebarnes said...
Hi Will and thanks for letting us ask you qusetions here. New first meeting was last night enjoyed it.

"I am tring to learn as much as i can about outside off camera flash. My questions is first is what equitment do you use. What is your starting set up for outdoor small flash if you do have a starting point. Say when you are on location and you have your camera settings at ss 400 f/4 iso 400 the 580exll and do you use FEC and CEC to off set say CEC@-2/3 and FEC@+2/3 and what kind of defuser do you use.


Thanks Joe"


Joe,

I use a Canon 1D Mark III and 5D Mark II for camera bodies and various lenses. I have four 580EXIIs and three 430EXIIs for speedlights. I also have Alien Bees and White Lightning studio strobes. I use various modifiers for both my speedlights and studio strobes.

To answer your second question.......there is really no cookie cutter settings for lighting or exposure for that matter. The settings will or should be determined by how much light is available and what effect you're trying to achieve. Get to the location and then start metering for the ambient light. Each location will call for different settings. Also, you should try to stay within the max synch speed of your camera to flash. In most cases, that will be between 1/160 - 1/250 shutter speed...unless you're using high speed synch. That's a whole another discussion.

I shoot in manual mode for the camera and flash so there is no reason for me to use FEC or EV+-. I get my ambient exposure right with my camera and then set my flash exposure. I may have to make minor adjustments as the ambient light increases or deceases but I find using manual functions renders more consistent results and it puts the decision making in your hands and not the camera's.

I use various modifiers and diffusers. The most common is the shoot through umbrella, softbox, and beauty dish. I sometimes have to go bare bulb with just a dome diffuser if it's extremely windy. I had a shoot this morning and it was extremely windy and my umbrella actually turned inside out due to the strong gusts so I had to put it back in the bag.


This question was asked by Frank (cooksfriend):


Will if I am using CTO 1/4 gel and I double it, is my output the same as 1/2 CTO???

cooksfriend

Frank,
That's right Frank. Doubling a 1/4 CTO will get you the same color temperature as a 1/2 CTO however, you may loose a bit of flash power because the the extra sheet of CTO may eat some light. It's probably a negligible amount though considering the CTO gels are actually really thin.


Well, I hope this has been helpful. If anyone has any follow up questions, please feel free to ask.


Monday, August 24, 2009

Here's Your Chance to Ask Me


My next blog article will be on Location Lighting. Here's your chance to ask questions. I'll post as many questions and try to answer them all. Post your questions here regarding exposure, camera settings, light settings/output, color balance, exposure balance, synch, triggering, equipment, etc. Ask away!

Tuesday, August 11, 2009

Don't Be Afraid of the Shadow

Shadows create depth and dimension but they can also create something artistic like seen here:

This was taken with a single AlienBee B800 inside of a beauty dish.

Beauty Light

The recipe of beauty light typically calls for two light sources. One light source on top and another on the bottom. This is also called clamshell lighting. The light sources should be large and very close to the subject to provide a nice even, soft radient glow. I added a third light source to this shot of Shawn, an Alien Bee 800 right behind her to add a nice touch to her hair. t
This image was made with a 5D Mark II. Alien Bee B800 inside of a large softbox above and to camera left. A reflector below her which counts as another light source. An Alien Bee B800 right behind her.

Saturday, August 8, 2009

Overpowering the Sun

The sun is a huge ball of fire that's a 100 times larger than the Earth so trying to overpower it is no easy task but if achieved can render some dramatic results.

This image of Cris was made with a 5D Mark II 24-70mm f/2.8 L
(ISO200, f/10, 1/200)

Three 580EXIIs firing through a shoot through umbrella camera left, manual. All full power, all with a 3/4 CTO. All three were connected to a single PocketWizard PlusII.

Adding Props

I like to do things to mix it up a bit. Whether it's shooting at different angles, unique compositions, or as seen in this image, adding a prop. I found this vintage umbrella on ebay for $15. I think it adds a nice touch.

This shot of Alex was taken with a 5D Mark II 70-200mm f/2.8 L IS. TThree 580EXIIs firing through a shoot through umbrella at 1/4 power. All of them were triggered with on PocketWizard PlusII with a 3/4 CTO on each, camera right.

Thursday, August 6, 2009

Cheating the Sync

Most DSLRs these days have a maximum synch speed with the flash at 1/160 to 1/250. The shutter speed can be faster than the maximum synch speed but the flash will not fill the entire frame. This is problem when shooting in a studio where there's very little ambient light, but not that big of a problem when shooting outdoors where there's plenty of ambient light.

1D Mark III 24-70mm f/2.8 L
(ISO50, f/5, 1/400)

3 Canon 580EXIIs firing through a shoot through umbrella all at full power camera left.

I cheated the native sync speed 0f the 1D Mark III which is 1/250.

Friday, July 31, 2009

What's a good portrait lens?

What's a good portrait lens? I get asked this question a lot. There is really no such thing as a "portrait lens." Some lenses are better than others for portrait photography because of their focal length but just about any lens can be used for portraits. Typically 80-135mm is a good focal length range for portraits but sometimes I don't like being typical. This shot of Mandy was taken with a 400mm f/2.8 L IS. 400mm is pretty far from the typical 80-135mm range but the results are magnificent.

Wednesday, July 29, 2009

Lights on / Lights off

Lighting is as much about what you don't light as what you do light. As photographers, we have the ability to orchestrate the viewer's eye with composition, leading lines, and how we light. Light can put the focus on something specific and the absence of light can remove the focus on what's not important.

With the image above, I light the model's face with directional side lighting to emphasize her hair, eyes, and lips. I also placed a light underneath her dress to give it a glow and the lead the viewer's eye from her face to something almost as important; her wedding dress. I made sure the light didn't contaminate the background so then only thing that's visible is her.

In most cases, defined shadows can be distracting but in this image, the shadows adds a nice artistic element. I used a single strobe inside a beauty dish which puts out light that has a bit more contast that a softbox does.


Thursday, July 23, 2009

DreamScapes

Photographs taken by me in Hawaii and Utah. Enjoy.

Sunday, July 19, 2009

Worldwide Photo Walk

The Second Annual Worldwide Photowalk was yeterday. I decided to participate at two locations; Norfolk & Williamsburg. The Norfolk photo walk started at 10AM. Here's a group photo I took of all us.


The photo looks like it was taken more like 6AM. That's because I purposefuly underexposed the ambient light and used 3 speedlights to light us.

I thought I would do things a little differently this year and incorporate off camera flash in my shots. I spent about two hours with my buddy Mike Preston, just walking through the streets of downtown Norfolk looking for compelling people to photograph.

Here is a man I spotted passing by on his bike who allowed me to photograph him. I used three 580EXIIs mounted on one light stand, gelled with 1/2 CTOs, shooting through an umbrella.


After the photo walk, we had lunch at Gillians in Norfolk; bad food and bad service but getting to meet other photographers was worth it.

I made it home, changed my clothes, and made it to the Williamsburg walk just in time to be late. I eventuallty met up with the other shooters. Here is one of the shots I took in Williamsburg. I took a similar shot a few months ago but this time I added flash to the moving subject. Again, I purposefuly underexposed the ambient light and cranked up the flashes.


All in all, it was a fun day. I didn't get any award winning shots but it was nice to just get out there and strobe.

Tuesday, July 14, 2009

Ticked Off

I often go to great lengths to capture a compelling photo. I've been knee deep in fast flowing waters, standing on slippery rocks, trying to balance myself and my tripod/camera at the same time to capture a shot of the Upper Provo River, Utah. Seen here.


I was in a open helicopter (no side windows), leaning out over jagged knife like rocks and cliffs to capture a breathtaking scene of a reflected rainbow in Kauai. Seen here.


But, my scariest moment involving my camera was......
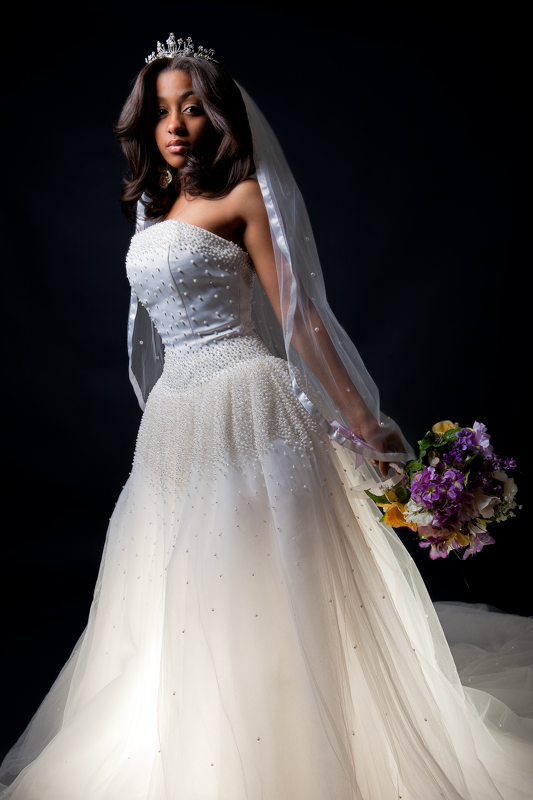
...last night when I found a tick on my back. I was at a local park near dusk photographing Ajike in her wedding dress this past Saturday. There were several times where I placed myself in high grass/weeds, thorn bushes, and layed in the grass to get the right angle and perspective. (She was low, so I got low)


Another shot from the same night


I went home with several mosquito bites all over me. Two days later, after scratching the itchy bites profusely, they turned into scabs. I felt what I thought to be a large scab on my back and checked it in the mirror. I asked my wife to look at it and from her initial reaction I knew it was a tick. ARRRRGGGHHH! I hate ticks! She got the tweezers and safety pin and dug that buried sucker out.

Note to self: Do a thorough check after an outdoor photoshoot
or
stay in the safe confines of a studio!


B&H