It's been awhile since I've updated my blog. One of my photography related New Year's Resolutions for 2011 is to update my blog at least once a week. I want to add more images and the details of capturing the images. I plan on featuring some guest bloggers as well as some works of other photographers that I know and admire.
In addition to regularly updating my blog, I want to continue putting on photography and post processing workshops. I plan on doing a few classes on camera techinques, lighting, and Lightroom and Photoshop workflow. I'll announce those classes and dates on my blog as well as my Facebook page, so please check back.
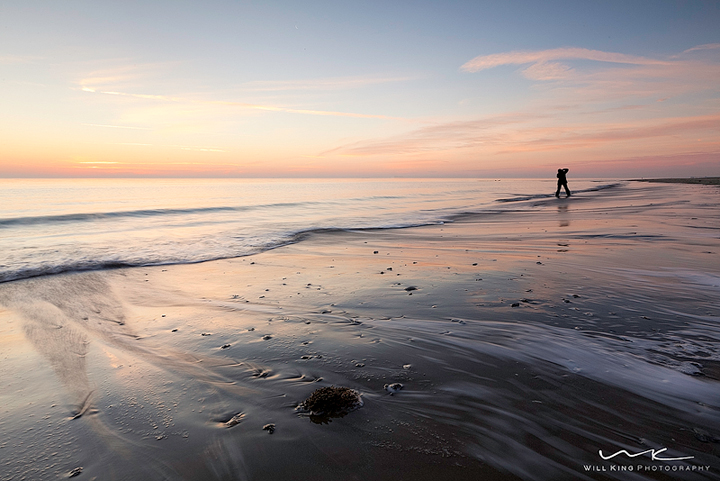
For 2011, I started out the New Year by waking up and shooting the sunrise with some friends, Sherry and Genevieve. We went to Salt Ponds near Buckroe Beach in Hampton. The morning was actually mild for January. Here are a few shots I got from that morning.
That's fearless Sherry on the right in the water shooting the sunrise.
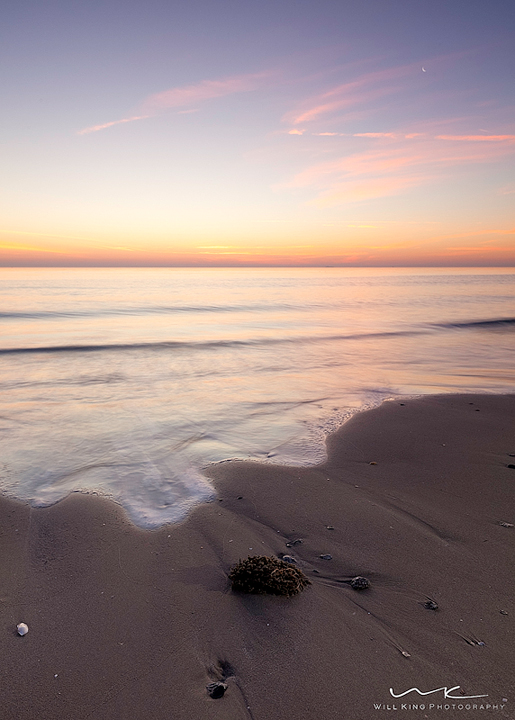
I was able to compose this shot with the moon in the sky. You can barely tell it's the moon since I shot this with a wide angle lens. I also lit the foreground with one speedlight gelled with a 3/4 CTO.
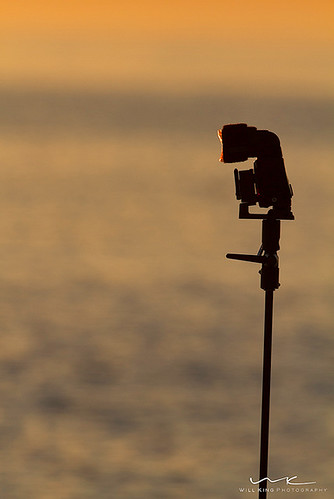
580EXII with 3/4 CTO gel fired remotely with Radio Poppers to add some fill light to the foreground.
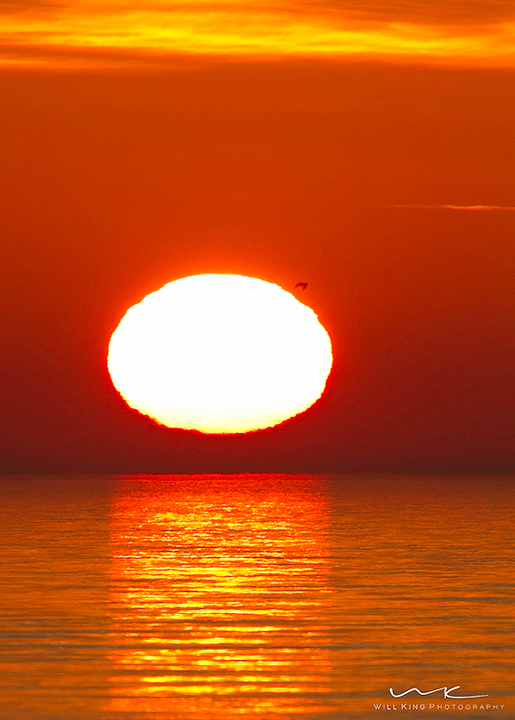
I capture this shot of the sun with my 400mm f/2.8L IS w/ 1.4X TC attached to a 7D.
Same gear to capture this beach bird.
.....and we ended the morning by meeting my wife, son, and Gen's daughter at IHOP. One of my son's New Year's Resolutions is to eat more pancakes.
This is a repeat of a blog post I did last year. Also here's a replay of the Fox 43 interview.
The Holidays should be a time of joy and celebration but it often turns stressful for whomever is in charge of taking the pictures. This year, eliminate the stress and take better pictures by following a few basic tips.
Be Prepared
The night before the holiday gathering, make sure you have your gear ready. This means fully charged batteries, and an extra set. Plenty of empty memory cards. Tripod, light stands, reflectors. You may also want to have your camera and flash settings correct prior to the family gathering as well. This will ensure your pictures turn out great without having to fumble with the settings while your family is there.
Use the Right Light
When photographing the Christmas tree, avoid using flash. Flash will overpower the lights on the Christmas tree and create a harsh shadow. Also, try out of focus shots when photographing the tree.
If it's all possible, avoid using the on-camera pop-up flash when photography people. Direct flash is very unflattering and should be avoided. If you do not have the option for remote flashes, using something like a piece paper towel over the flash will help soften and diffuse the light.
Also consider using as much available light as possible. This means opening the windows and letting natural light in. If you're using lights from lamps or other artificial light sources, remember to change the White Balance setting on your camera to avoid strong color shifts.
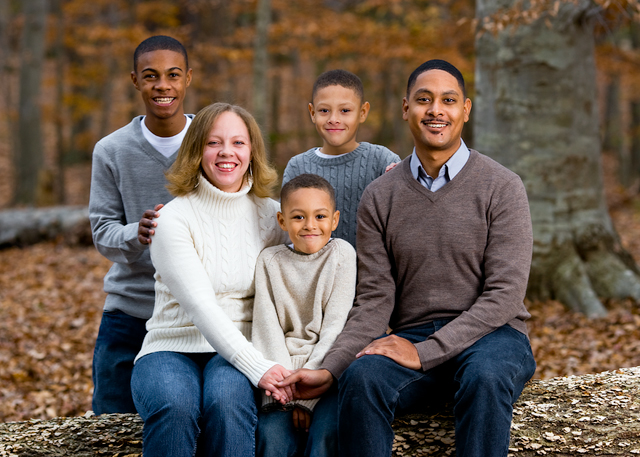
Getting Great Holiday Family Portraits
Hire me!
But if you want to try yourself, these tips may help.
Have the family wear festive, holiday colors. You want the photo to say the Holidays so greens, reds, and whites are appropriate. Not everyone has to wear the same color, but patterns and busy prints should be avoided.
If you decide to take the photo outdoors, earth toned colors are a safe bet.
Make sure all your camera and lighting settings are correct before the family poses. This will ensure that the task will be stress free and that you keep your subjects looking happy. This is especially true for kids and babies. You'll have a time span of about 2 minutes. Make sure you spend that time getting great smiles and expressions and not fidgeting with your camera settings.
When photographing a group of people, have everyone close their eyes and count to three. On three, have them open their eyes and then take the shot. This will reduce the chances of someone blinking.
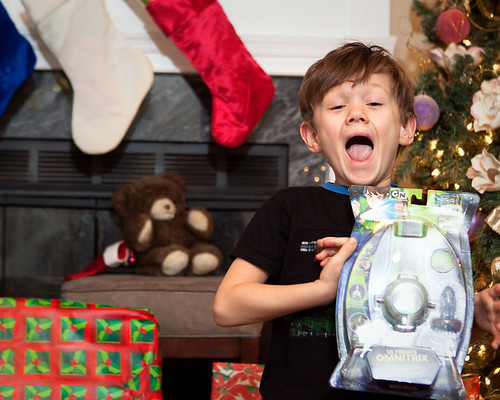
Getting Great Holiday Family Candids Make a list of shots that you don't want to miss. A list will help you remember important shots that you may otherwise forget because of the hectic nature of the day.
When photographing kids and pets, get on their level. Perspective can make a break a photo.
Anticipation is the key. Be ready when kids open their gifts to make sure you capture their expressions.
Take a shot for every gift opened. This will help keep memories alive.
When photographing in the snow, remember that all digital cameras will have a tendency to underexpose. Change the settings on your camera to increase the exposure 1-2 times the norm.
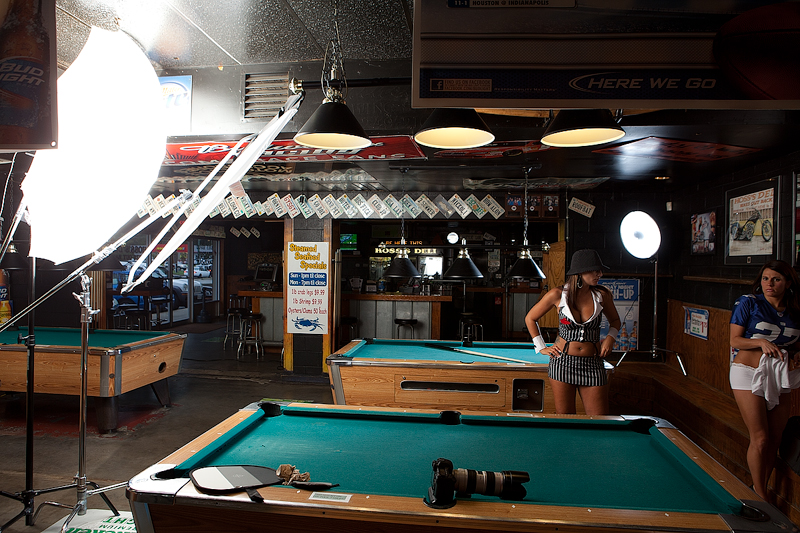
I recently watched a video where Joe McNally used a Lastolite Skylite inside of a Irish pub to shoot a band. He used flashes shooting through umbrellas which were shooting through the Lastolite Skylite. I've seen him do this at Photoshop World in Boston about 2 years ago. The setup creates this huge soft light.
This gave me the inspiration to try this on one of my shoots. I used a strobe shooting through an umbrella which was shooting through a California Sunbounce 4x6' frame with a 3/4 diffusion panel. I also had a strobe with a beauty dish from the rear as an accent light.
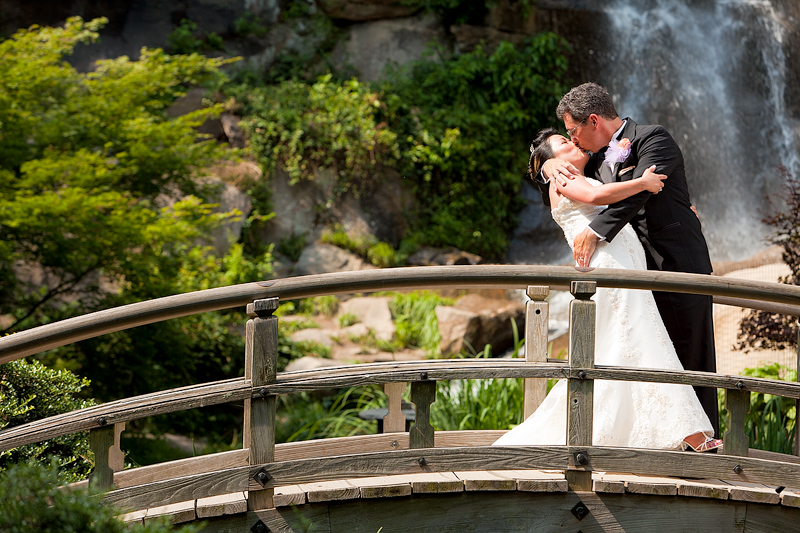
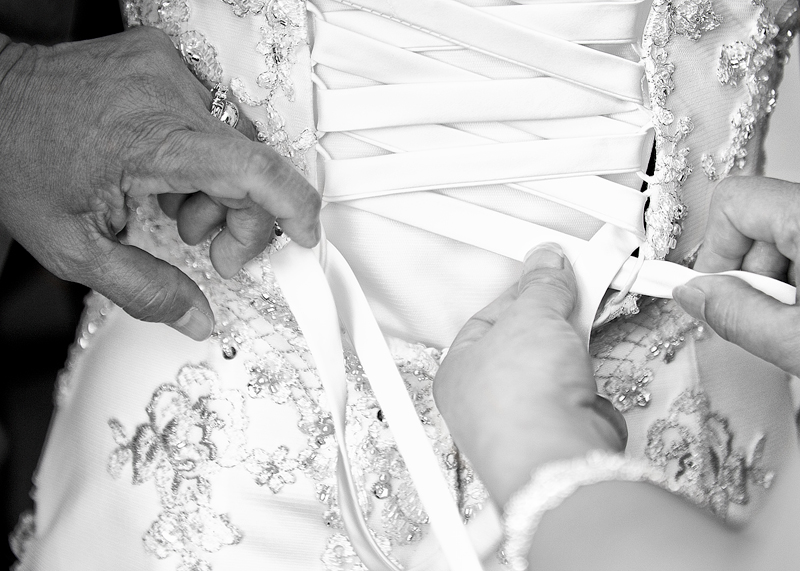
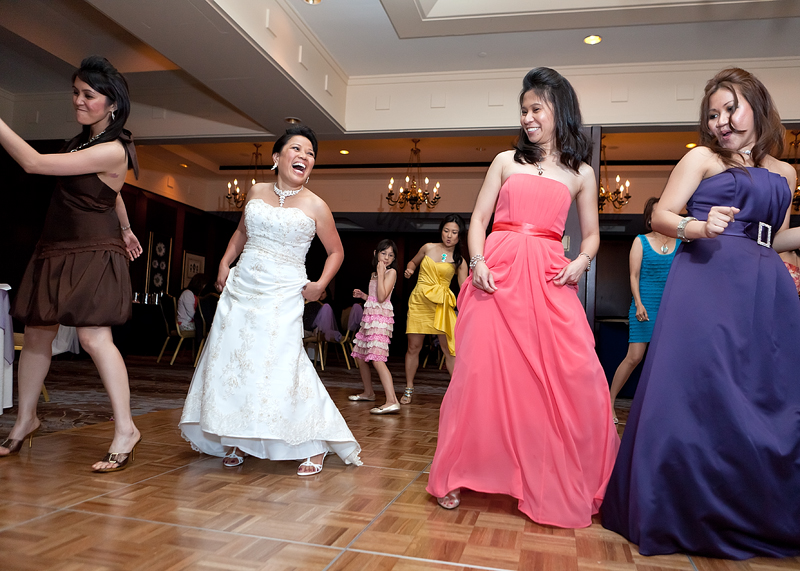
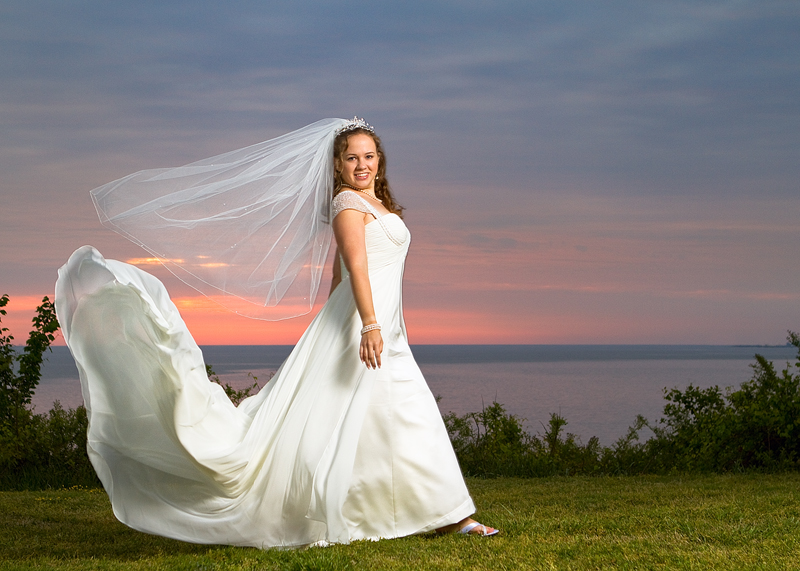
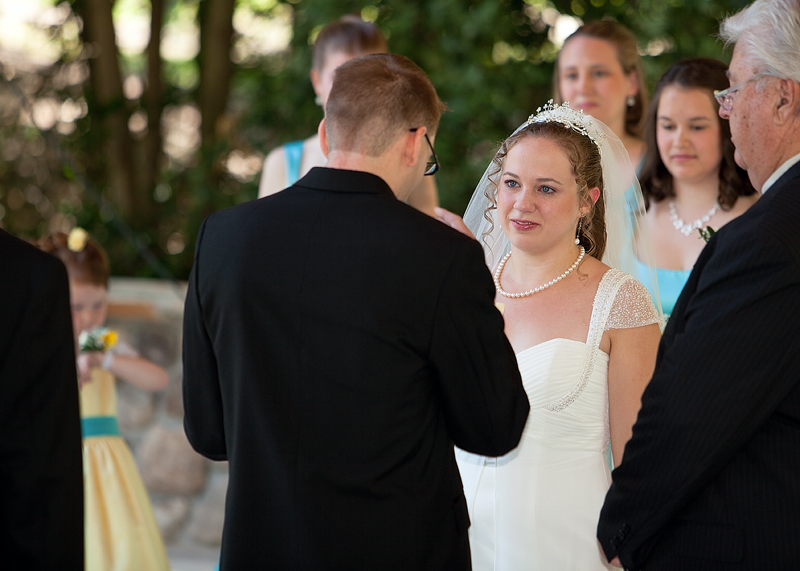
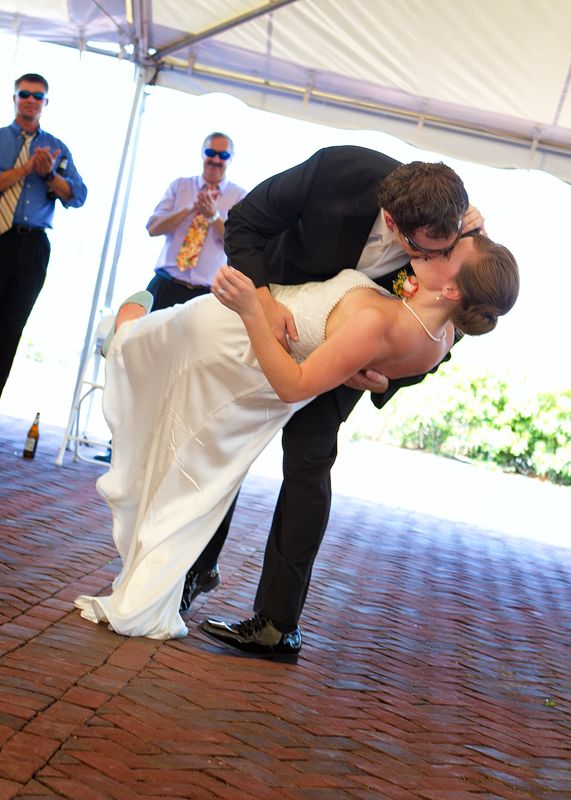
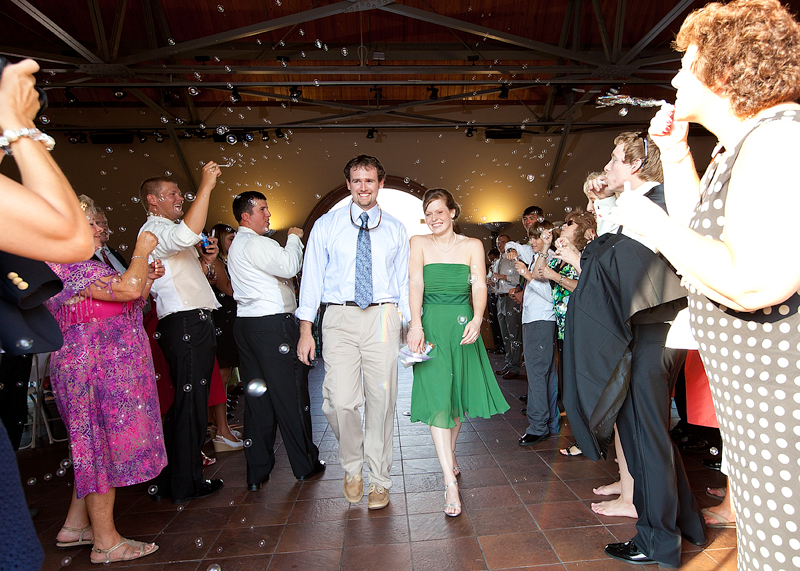
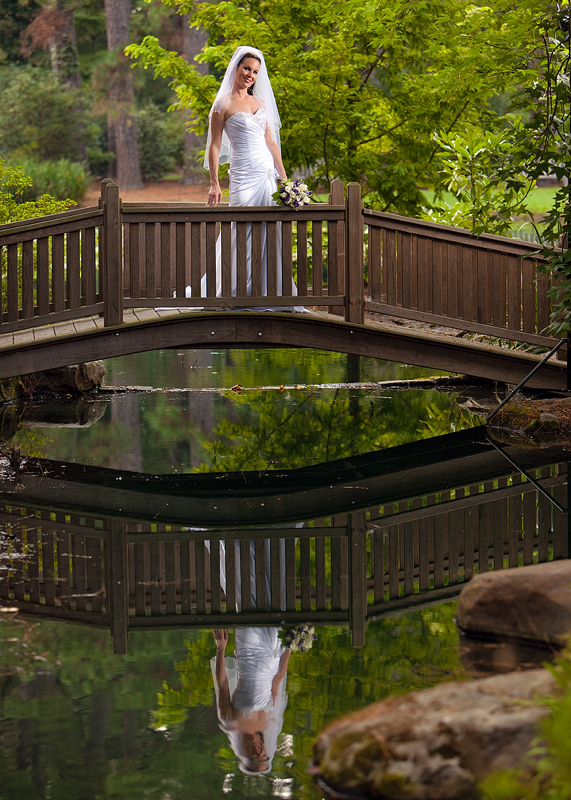
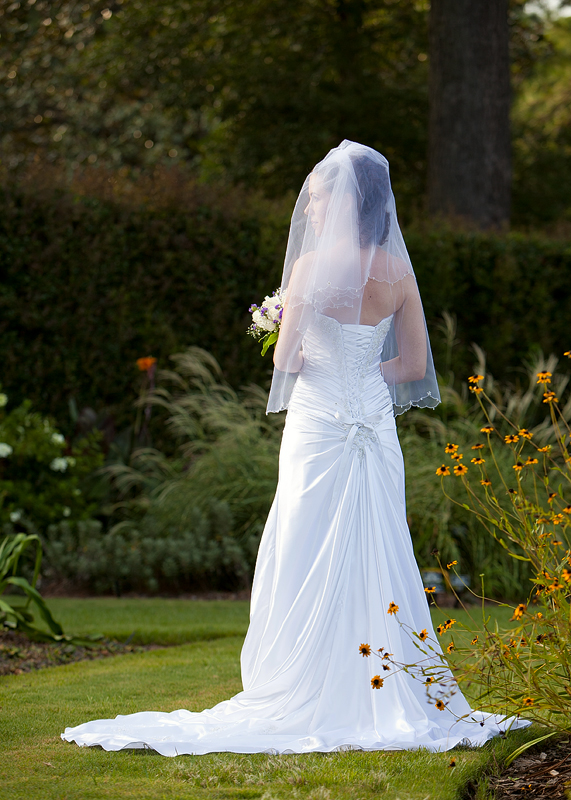
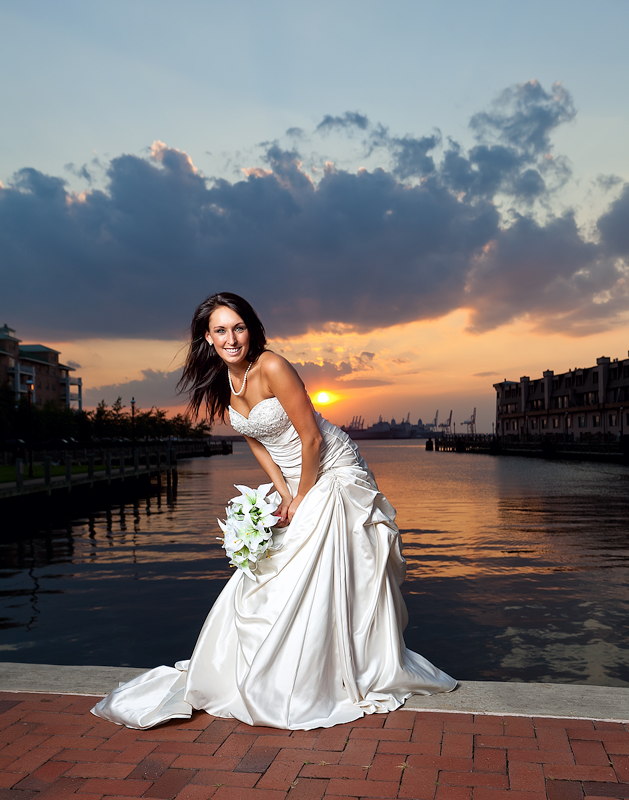
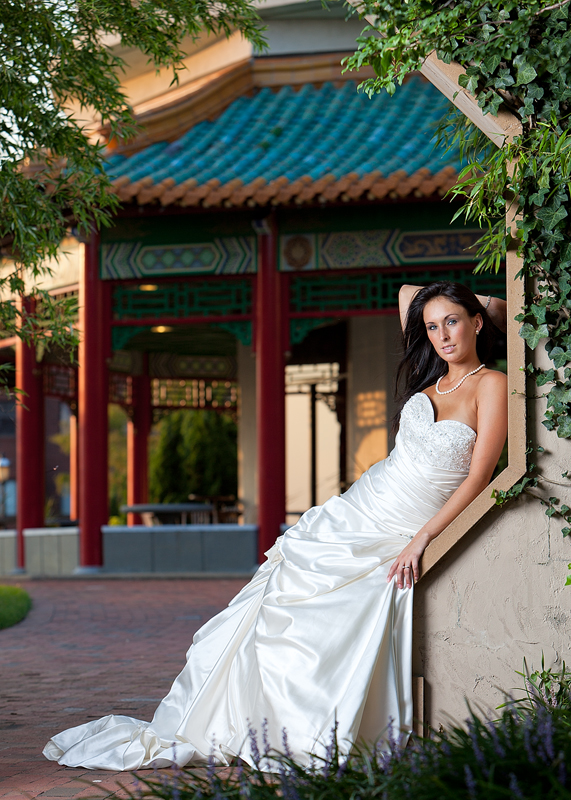
Me! I was so excited yesterday morning to find out that my work was featured on Hampton Roads Bride's website. Kelsey L. Clayton the Assistant Editor at Hampton Roads Magazine originally contacted me a few weeks ago while I was wrapping up an Outdoor Lighting Workshop that I teach to find out if I was interested in submitting some of my wedding and bridal images to be featured on their site. With enthusiasm I replied "Absolutely!"
I gathered images from my last 5 weddings and bridal shoots and contacted the brides to let them know the exciting news. It seemed like Deja vu yesterday morning. I was wrapping up another Outdoor Lighting Workshop and I got an email from Kelsey stating that the my feature was just posted to their site. Of course I called my wife to share the great news. I also called the brides and my friend Genevieve who has assisted me in creating most of these beautiful images. Here's the link to the feature: HR Bride: Will King Photography and some more great images from recent weddings and bridal shoots.