Sunday, October 18, 2009

Accent Lighting

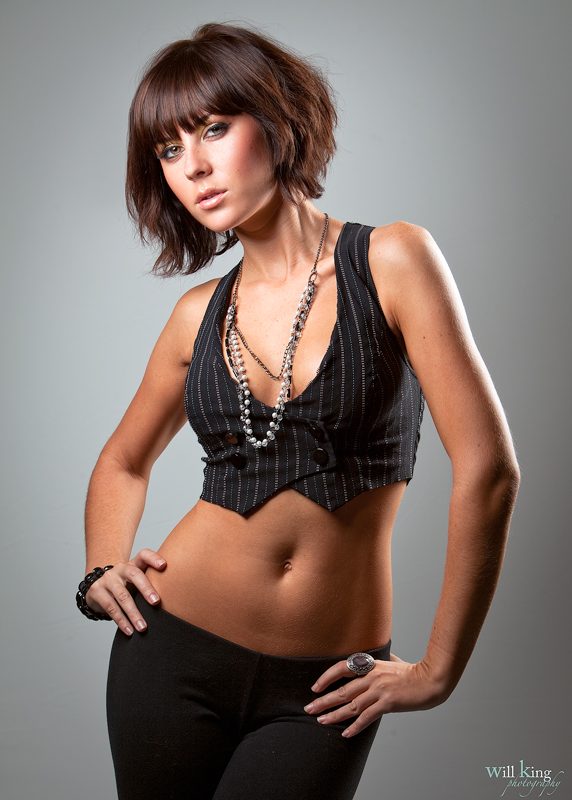
Accent lighting can add a nice three dimensional touch to any shot but it can be challenging to properly execute. The goal is to create a soft light that can be contained to a certain area. Soft light usually spreads everywhere thus making two light sources appear flat. So how do you create soft light that's also controllable? Grids!


For this shot of Heather, I used a Beauty Dish with a grid on it (camera left) as the key light, and a stripbox with a grid (camera right) for the accent light.

Sunday, October 11, 2009

Seascape Techniques

I posted some seascape images in my last Blog post . For this blog entry, I'll list some techniques and equipment I used to capture them.

Exposure
Getting the correct exposure is vital with any type of photography and seascapes are no expcetion. I like photographing the sea when the sun is near the horizon. This is the time when the drama happens. The colors will be vivid and bold and the colors will be reflected off of the water.

Keep in mind that the expsoure will be tricky because the sky will be bright and the foreground will be dark. It will be difficult to show detail in both the sky and foreground because the range of light will often be greater than what the camera can handle. You can overcome this by either using a graduated neutral density filter or braketting the exposure and bledning the exposures in post processing. (I'll post the step on how I do this later in the week) To bracket the exposure, place your camera on manual exposure. I like using a small aperture (f/11-f/22) to increase the depth of field. Use the lowest true ISO your camera can go to. Adjust the shutter speed to get a decent base exposure and then just vary your shutter speed up and down + - 3 stops.

Composition
Rule of thirds! Enough said! Actually I'll expand. Try not to split the horizon and try even harder not to place the sun smack dab in the middle. This will create a bullseye effect and the viewer's eye will focus in the center and stay there.

Keep the horizon level!

Look for an interesting foreground obect(s). (Rocks, drift wood, shells, jetty, or bring your own starfish.)

Try getting low. Avoid having the camera aimed straight and at eye level. Remember that you're creating art and not just recording events.

Focus
Use one focus point and place that focus point on the lower thirds, usually on the interesting foreground object. Once you have the focus locked, set it to manual so it won't refocus as you bracket your shots.

Color
In most cases Auto White Balance will do just fine but try experimenting with different Kelvin values. In most cases Auto White Balance will try to correct color, so if there is a very warm sunset, AWB will overcompensate and add more blue to try to "correct" the color. If accuracy is vital to you, using a calibrated gray card is a good way to make sure the white balance is accurate. Keep in mind that shooting in RAW is extremely beneficial not only for exposure forgiveness but also for nondestructive color adjustments.

Equipment Considerations

  • Sturdy tripod and ballhead - ensures sharpness
  • Cable release - ensures sharpness
  • Graduated ND filter - Balances contrast of bright sky and dark foreground
  • ND filter - slows shutter speed to capture motion in the water
  • Lenses - Various focal lenghths for various looks. Typically wide angle works best. Lens with large aperture and IS are not necessary.
  • Circular Polarizer - boosts saturation, darkens skies without darking white clouds, reduces glare off of water, see underwater objects normally unseen without polarization.


Wednesday, October 7, 2009

Sand, Sea, & Sky

Next Tuesday's class (October 13th) will be on the topic of shooting seascapes and fall foilage. Here are some seascapes I've shot in the past. We'll talk technique in the class.


Thursday, October 1, 2009

Old Fashion Bubbles

Here's a shot of Andrew playing with bubbles. I converted the image to sepia.
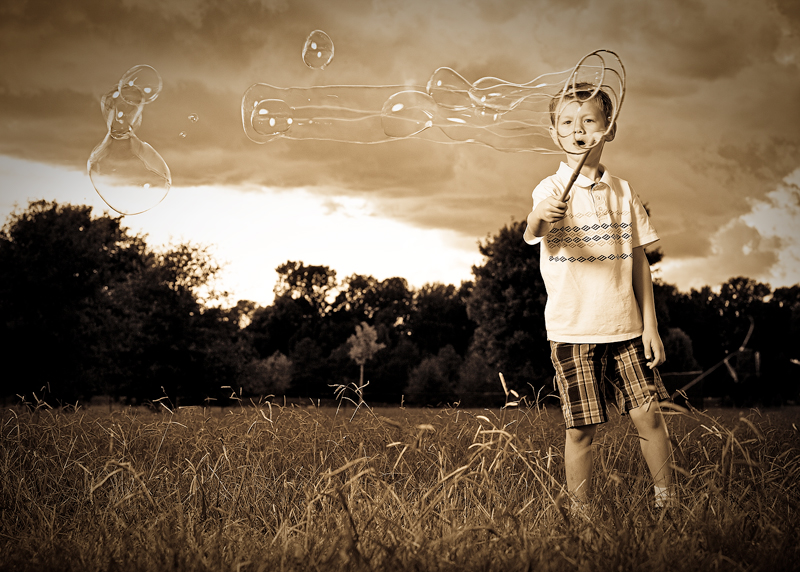
Remember, when shooting children or pets, get on their level.

B&H