I will probably start each blog entry with this generic disclaimer below.
These are some of the steps and techniques that I use. I have learned some of these techniques from various sources and some are techniques that I have created. In the world of photography and Photoshop, there are several ways and methods to achieve certain results. In no way do I think that the methods I use are the only methods or even the right methods. They are methods that I have been accustomed to and that I am able to get my desired results. Photography and post processing techniques are constantly evolving so in many cases my techniques change. I feel that we are all students of light and the digital darkroom so please feel free to add your thoughts, your questions, and if you're willing to share, your techniques.
You have the ability to change settings on your DSRL such as aperture, shutter speed, and ISO just to name a few. What settings you change and how you change them will effect how your image turns out. In this blog entry, we will discuss how shutter speed effects your image. This first installment will be about slow vs fast shutter speeds and what kind of results you can expect by using varying shutter speeds. The second installment will be about the things you can do to achieve tack sharp images; in camera and post processing.
Keep in mind that a photograph is a snapshot of time. It's static and unlike video, it's only one frame. In that one frame, you will be capturing everything during the exposure time. The exposure time is how long your camera's shutter stays open.
Let's use a few photos that have varying shutter speeds to show how they have an effect on motion blur. All these shots were taken with a camera mounted on a tripod.
This is a shot I took last year at Ocean View Pier. It was taken with a 5D and 17-40mm lens @ ISO50, f/16, .5 second shutter speed.

Notice the motion blur of the water, especially on the bottom right side? The water was rushing in pretty fast and the my camera was able to capture that motion during the half second shutter speed. A half second doesn't sound like a long time but think about this; Swing your hand from right to left as fast as you can in front of your face. How long do you think that took? Perhaps 1/3 of a second? Well, if you took a photo of that and the shutter speed was 1/2 of a second, your hand would be a total blur because remember, your shutter captures everything while it's open.
Let's use an extreme example.
I took this shot in Hawaii several minutes after the sunset. I took it with a 5D and 16-35mm. ISO50, f/22, 30 seconds.
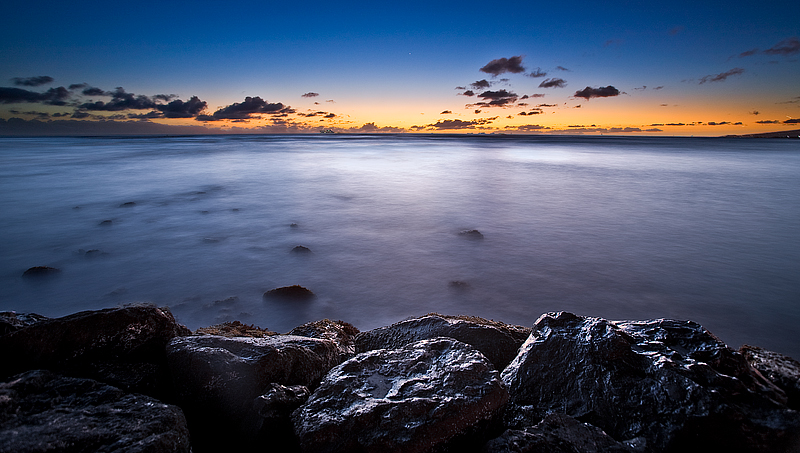
Notice how the water looks almost like smoke or fog? This is because the camera's shutter stayed open for 30 seconds, capturing all the movement of the water during that time, thus creating that foggy/smokey look. Why are the rocks sharp and the water blurry? I had my camera mounted on a tripod. The rocks aren't moving nor is my camera. The only thing that was moving was the water and clouds. It wasn't very windy that day otherwise the clouds would have a cool motion blur to them as well.
Now let's look at a photo taken with a fast shutter speed. I say fast because it was taken at 1/500 of a second but actually that's a bit slow in terms of sports photography but when light is scarce and your ISO is almost maxed out, there is really no other choice.
This shot was taken with a 1D Mark III and a 400mm L f/2.8 IS. ISO3200, f/2.8, 1/500.
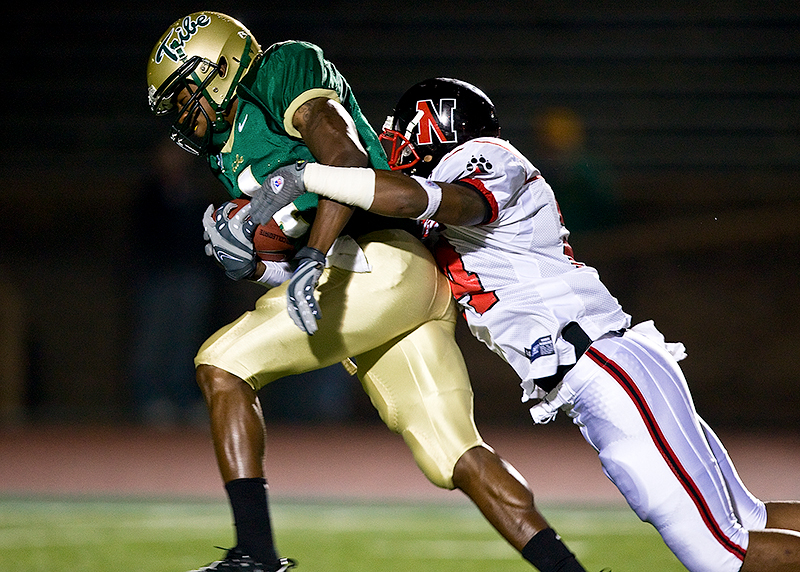
As you notice, most of this shot is sharp. Both heads and bodies are sharp but look at the receiver's calves. Notice some blur? Well, that's because his calves were running. Yes, his body is attached to his calves and both players are in motion, but his calves were moving back and forth in addition to his forward motion. While 1/500 was fast enough to get his head and body sharp, it was to slow to eliminate motion blur of his calves.
As you can see shutter speed plays a major role in creating your image. Most DSLRs have the ability to snap a shot as fast as 1/8000 of a second. They also have the ability to capture very long exposures, sometimes up to hours, depending on how long the battery will last. I encourage everyone who has a DSLR to experiment. Take it out of auto mode and go into full manual. Try different shutter speeds and see how the effect your images.
Again, if readers have questions or input, please post them.
The second installment about the things you can do to achieve tack sharp images; in camera and post processing will be added in a day or two. This will also be about shutter speed, but also about other settings on your camera that you can change to get sharper images.


6 comments:
Will you should be teaching! Very nice write up and examples. I'm looking forward to your future installments.
Will
How do you know what shutter speed?
Is it trail and error?
Or do you take a shot and work with what you have in PS?
Mark, I'm far from teaching. I'm looking forward to this new year with TDPC and you as my mentor.
Hey Harold. The first thing is to decide what you're going for. Every situation will be different. There really are no absolutes. Even with sports shots, you can really slow down your shutter speed as long as your panning and timing are perfect.
For landscape shots, I usually start out in aperture priority (usually f/11 - f/22 to maximize the depth of field) at the lowest possible ISO, take a few shots to get some meter readings and histogram info. Once I decide on a good exposure (aperture/shutter combo) I then go to manual. I take several shots at a fixed aperture and vary my shutter speed. I do a lot of manual exposure blending, so depending on how much contrast is in the scene, I may take up to 6-8 exposures varying from -3 stops up to +2 stops and then pick 2-3 to blend.
If there isn't that much contrast in the scene, I may just use a CP filter or a grad ND filter with one good exposure.
So to answer your question, if I haven't already, I let the histogram tell me what the shutter speed should be and then go under and over. Thank goodness for digital. ;)
Two more questions.
1) what is TDPC?
2) if you start out in aperture mode and find the perfect combo then why go to manual mode?
Will I promise no more questions for this blog ;-)
Harold, the TDPC (Tidewater Digital Photography Club) is a camera club I belong to. Pretty awesome club. We cover Photoshop and photography on alternating Tuesdays.
I go to manual for 2 reasons. I have full control over shutter speed. In aperture priority, the shutter speed can fluctuate 1/3 - 2/3 stops sometimes even when you're taking the exact same shot. Also, if the contrast or dynamic range is extreme, I can always dial way down and dial way up. I believe in aperture priority, you can only go -3 to +3 using exposure compensation. Hope that answered your question. Feel free to ask away. I'll be covering how exposure can effect sharpness in a day or two. I hope you visit back. I'm probably making plans for PSW 09 tonight. Can't wait.
Thanks
I can't wait for the next blog:-)
Let me know if your going to PSW.
Post a Comment